Saturday, May 5, 2012

Dart Manipulation #4: Pivotal transfer technique

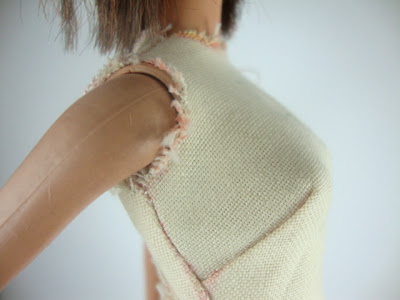
In this case i did not connect the dart leg to the bust point i left the bust point intact


The pattern is place on another pattern paper, i then put a pin through the bust point and the pattern paper below


label the dart leg A and B and mark the point where you want the new dart to be (extend it to touch the paper below), which in my case is the mid neck. Also mark the position of dart leg A on paper below.


Now i draw the outline from the mark at the neck point to that at the dart leg A. As you can see i labelled the mark at the neck C


Now rotate the pattern until dart leg B is where is where A used to be.


Now draw a line from point C to dart leg B


Now connect dart leg to dart point and viola ( all lines joined and trued )


Friday, May 4, 2012

Dart Manipulation #3: Slash-Spread technique

Bellow is basic bodice pattern i started off the manipulation with


So first you draw a line from the dart point to where you want to re-position the dart, in this case am moving it to the shoulder


cut through the line to the dart point


close up the old dart to open the new one and tape the old one close


here are the rest of the pictures


next time i will show the pivotal transfer technique which i like the most, though for a small pattern as barbies', the slash method was easier.

Sunday, April 1, 2012

Dart Manipulation #2 : straight dart to waist dart

   So i figured out the bust point but it is slightly higher than its suppose to be, I wanted to move the dart completely(parallel to the old dart) but then I will have to make a muslin and test the fit so I decided to cheat and just do this:

   I marked the bust point on the muslin, then opened it up using a seam ripper and put the transparent pattern on it to transfer the marking on the pattern


 So this is how I cheated, I hope it's not gonna cost me
I joined the bust point to the dart legs which as u can see does not correspond to the dart point so fingers crossed


I then drew a perpendicular line to center front and then a line from the waist line  to the bust point


  I then cut along that line and moved the part that I cut to close the straight dart (some people call it bust dart).


Next true side seam


and VIOLA


I don't know, i think its not perfect but am still going to continue working with this pattern. Some people use tissue instead of sewing in muslin every time, may be i will try that.


Saturday, March 31, 2012

Dart Manipulation #1

Dart manipulation is the process of changing the position of the dart to create a different design. This can be done even on commercial patterns, that way even if you don't want to study patternmaking in detail, you can still create new designs from the patterns that you buy.
   This picture shows the basic locations of dart, starting from waist dart which was not labelled, next is French , then straight( perpendicular to center front) , then mid armhole,shoulder tip, mid shoulder, mid neck, center front neck, CF bust and CF waist dart.


        My Basic Barbie bodice has what was suppose to be a straight dart (though not that straight) so I need to make it into a waist dart because that is how the basic pattern is suppose to be according to the book I use.
Another thing is I have to figure out my bust point(apex of breast), unfortunately barbie doesn't have nipples, but am going to figure it out, though it got me thinking why I can't just use the dart point as a hinge if you know what I mean.
  This pic below will give you an idea


so this is how you manipulate dart, you slash a wedge and move it over to the other side while using the bust point as a hinge, i guess if i use the dart point then every dart will be radiating from a different point which i guess will distort the shape of the bodice. Both pictures above are from my patternmaking book.

Friday, March 30, 2012

Final sleeve pattern for now

So i didnt use the previous sleeve pattern again because i realized  the cap height is too long. I drafted a new sleeve free hand, with no specific instructions, but i made the cap flatter.
I increased the armhole ease of the bodice, so i made two sleeves and of course two bodice. Here is the result in pictures.


these are the sleeve patterns i used


These are the two bodice one on top of the other, you can see how i increased the armhole ease to the pattern piece below, of course the one above is the one from the previous post


this is the one with increased armhole ease, as you can see it didn't workout at all


This is the bodice from previous post, armhole  not altered, of course in the previous post i made the armhole deeper than the original bodice. 
The above was the more successful one though not perfect yet because there is bunching of fabric below the armpit, am not eager to fix that though as i have already said am going to start dart manipulation and maybe come back to the sleeve in the future, or may be just do the sleeve in human size coz this very difficult. I think that i can fix this by slightly increasing cap height. I am going to use my original bodice, the one in this post to do the dart manipulation. Am excited to start different designs from the dart manipulation, am using patternmaking for fashion design 5th edition by helen joseph-armstrong. I will talk about  dart manipulation in the next post.

Sunday, March 18, 2012

Fixing armhole for sleeve

These are the pictures of the changes i made in my bodice to accommodate the sleeve, i will comment on the result in the next post. i have also realized that the sleeve doesn't have to be perfect before i can start working on my dart manipulation, i think i will soon start with dart manipulation.


Saturday, March 10, 2012

Draping a sleeve

    I started trying to drape a sleeve. There were a few things i thought i must fix in the bodice before draping a sleeve, i thought i must increase the size of the armhole to provide ease for the sleeve cap.

also i thought i need to lower the neckline and probably increase the shoulder seem


Well i didn't do any of  that, i just thought i should see what will happen if i just fit the sleeve without doing any of the above, and well it didn't turnout good.here are the pictures.

This is how the sleeve looks off, I know, it doesn't look right at all.

This is it with the arm slightly forward, it looks quiet normal but of course it's not


When I pull the arm back to its appropriate position on the side it pulls the bodice as you can see and creates this puckering
With the arm up it pulls the bodice completely up


This is it with the arm pulled back, it pulled the bodice back

when I bring the arm back to the front, it seams as if  everything is fine. 

  Well am going to fix all of that, and also i had a really difficult time draping the sleeve because i couldn't lift her arm, so i decided to buy a barbie fashionista (ball jointed barbie), my second try will definitely be on her.


Thursday, February 16, 2012

How to sew barbie pattern 2

Pin dart on seam line and another pin on the side, the dart is so small I don't know how accurate it's going to turn out.


 Sew dart
 My first stitching didn't go so well there    was looping underneath, so I removed it   and sew again. Of course if this was human size cloth it will be much easier to pin and sew.


I like to leave extra thread at the tip and legs of the dart to tie double knot and then cut, repeat at the end of the dart.


this is after cutting off the extra thread


All darts done, now press dart down as shown below


Pin shoulder seam, the back seam is bigger, if this where my pattern I will true, but may be that's how it's meant to be.
Use two pins just in case , and move the pin on the seam out as u sew, don't let the needle strike it.


Side seam sewn


Double knot and cut thread


then press seam open


The sleeve seam to be too big for the armhole, unless of course its a gathered one.


So i tried to hand baste, but i thought there might be too much puckering so i machine baste.


Attach armhole and hem sleeve, I also  baste the sleeve in before sewing with machine.

This was the best I could, as you can see there is some wrinkling
In the first sleeve I sew with sleeve below, in the second I tried to sew with the sleeve on top, it didn't work out so well, i had to rip out the seam and do it again,
I guess I should have allowed a bit of gathering at the middle
Sleeve ironed


Clip the neck curve and press, then sew
Sewing the neck curve was quiet difficult, next time I will use a bigger seam allowance, this was 2/8 of an inch, I usually use 1/2 an inch
Sew side seam and sleeve


I pinned the center back and viola
Well the bodice and sleeve are too big but it was a nice experience now when I sew my sloper I would not make some of the mistakes I made here.